
关于图片的 翻转 和 旋转, 网上查到的资料, 几乎都是使用 CoreGraphics 在原有图片的基础上重新绘制一张经过变换的图片.
图片的翻转
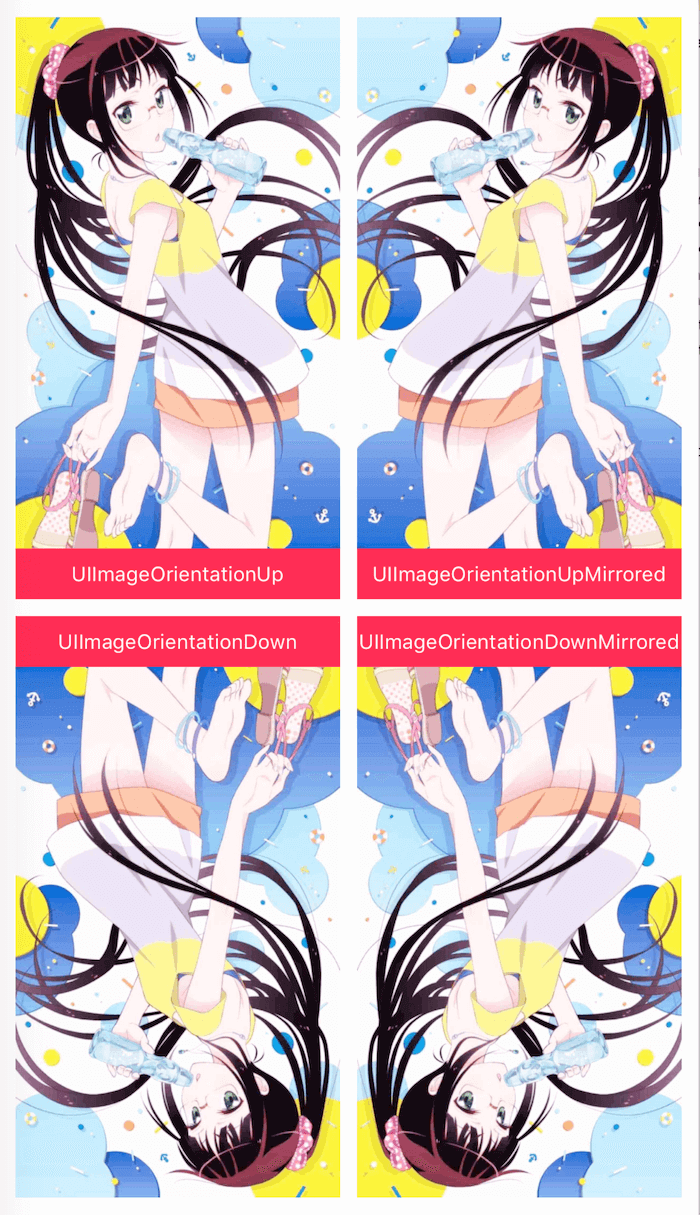
说起图片的翻转, 如果为了达到如下所有效果, 算上原图, 就要进行 3 次 绘制.
其实 iOS 已经提供了相关 API 来进行, 图片的 翻转 和 固定角度上的旋转.
UIImage 有如下初始化方法:
1
2
3
4
5
6
7
8
9
10
11
/**
 创建并返回一个 UIImage 对象

 @param cgImage     CGImage 对象
 @param scale       缩放因子, 可以改变 image.size 属性
 @param orientation 图象的方向
 @return UIImage 对象
 */
+ (UIImage *)imageWithCGImage:(CGImageRef)cgImage
                        scale:(CGFloat)scale
                  orientation:(UIImageOrientation)orientation
此处主要利用 orientation 参数来对 UIImage 对象设置图像数据的方向.
UIImageView 展示 UIImage 时候, 总是使用 UIImageOrientationUp 的方向来进行渲染.
如果设置 orientation 的值为 UIImageOrientationUpMirrored 在渲染的时候, 就会对 UIImage 的展示结果以 Y 轴为中心进行 翻转.
可用的枚举有:
1
2
3
4
UIImageOrientationUpMirrored,    // 原图保持不变
UIImageOrientationDownMirrored,  // X 轴翻转
UIImageOrientationLeftMirrored,  // Y 轴翻转
UIImageOrientationRightMirrored, // Y 轴翻转
图片的旋转
图片的旋转就会限制在 90度 的倍数旋转范围内.
1
2
3
4
UIImageOrientationUp,            // 原图保持不变
UIImageOrientationDown,          // 旋转 180 度
UIImageOrientationLeft,          // 旋转 90 度
UIImageOrientationRight,         // 旋转 90 度
CoreGraphics 绘图
如果需要进行特殊角度的旋转, 最终还是需要通过 CoreGraphics 相关的绘图 API 来实现.
图形的矩阵变换
当然, 如果仅仅是屏幕上的渲染效果的话, 也可以用过 CALayer.transform 属性来进行变换.
- 图片旋转
45度1
UIImageView.layer.transform = CATransform3DMakeRotation(M_PI / 2, 0.0, 0.0, 1.0);
在手机屏幕上做
2D旋转时候, 在手机的3D空间中, 实际上是绕Z轴做旋转.因此此处X,Y传值为0.0f,Z传值为1.0. - 翻转图片
1
2
3
4
5
6
7
8
// X 轴翻转相当于绕 X 轴旋转 180 度, 效果同 UIImageOrientationDownMirrored
UIImageView.layer.transform = CATransform3DMakeRotation(M_PI, 1.0, 0.0, 0.0);
// Y 轴翻转相当于绕 Y 轴旋转 180 度, 效果同 UIImageOrientationUpMirrored
UIImageView.layer.transform = CATransform3DMakeRotation(M_PI, 0.0, 1.0, 0.0);
// 先 X 轴翻转, 在 Y 轴翻转, 想让与绕 Z 轴旋转 180 度.
UIImageView.layer.transform = CATransform3DMakeRotation(M_PI, 0.0, 0.0, 1.0);
// 或者
UIImageView.layer.transform = CATransform3DConcat(CATransform3DMakeRotation(M_PI, 1.0, 0, 0), CATransform3DMakeRotation(M_PI, 0, 1, 0));
- 放大图片
1
2
// X, Y 轴同时方法 2 倍, 当然平面图, Z 轴放大也没任何意义.
UIImageView.layer.transform = CATransform3DMakeScale(2.0, 2.0, 1.0)